
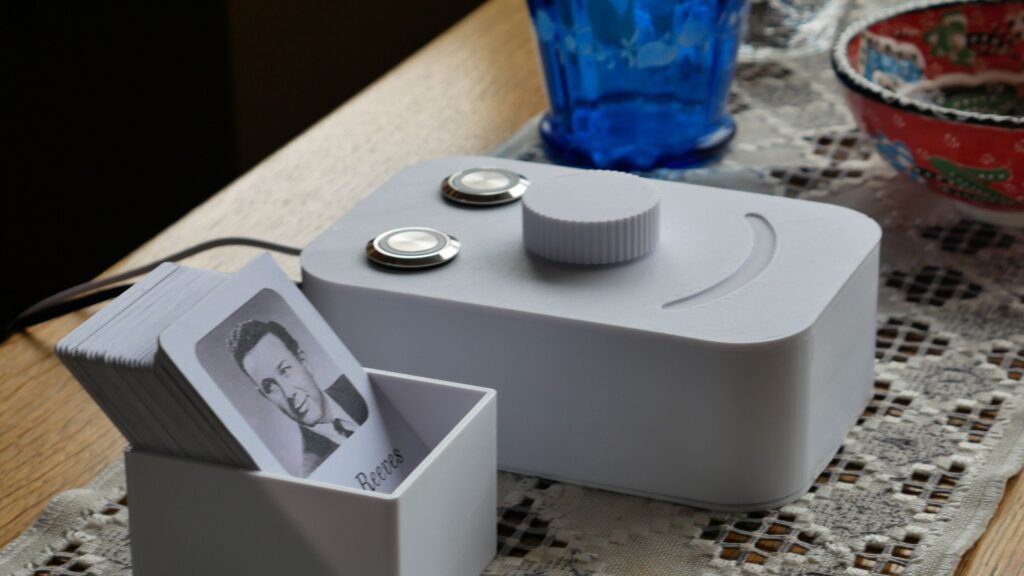
This is the Juuke box. The Juuke box is your
own musical friend, made to be as easy as possible to use. It is
especially designed to be used by elderly and kids, but can of course be
used by all other ages. The reason we created this, is because of my
girlfriend’s grandmother.
She told me that her and her grandma
sitting in the kitchen, listening to music, dancing and laughing. Sadly,
through the last years, her grandma has been in and out from hospital.
On her worst days, however, music is one of the few things that still
makes her smile. And music players like CD players are just too hard to
use for her. That’s why we created the Juuke.
The Juuke Box works by using RFID cards to play specific songs from an SD card. You could also play the songs randomly using the green button, or play and pause with the red button.
This way, it is really simple for everyone to play music.
Step 1: Watch the Video!
We made a video showing how me made it:)
Step 2: Gather the Parts:
We got all the parts from AliExpress, and links to the parts are listed below:
Parts:
Arduino UNO AliExpress& Amazon
DFPlayer Mini AliExpress & Amazon
Micro SD card AliExpress & Amazon
Arduino UNO DIY Shield AliExpress & Amazon
RC522 – Buy 2 to be sure, some of them arrive broken AliExpress & Amazon
RFID Cards AliExpress & Amazon
AUX Stereo Jack AliExpress & Amazon
22 mm Momentary Push Button – 1 Red and 1 green – 3-6V AliExpress
10K Potentiometer AliExpress & Amazon
Wires AliExpress & Amazon
1K Resistor AliExpress & Amazon
Pin headers AliExpress & Amazon
Breadboard – Optional AliExpress & Amazon
Jumper wires – Optional AliExpress & Amazon
5V power supply –AliExpress & Amazon
Power Jack – AliExpress & Amazon
Tools:
3D printer AliExpress & Amazon
Soldering Kit AliExpress & Amazon
Wire Stripper AliExpress & Amazon
Step 3: Test the Parts
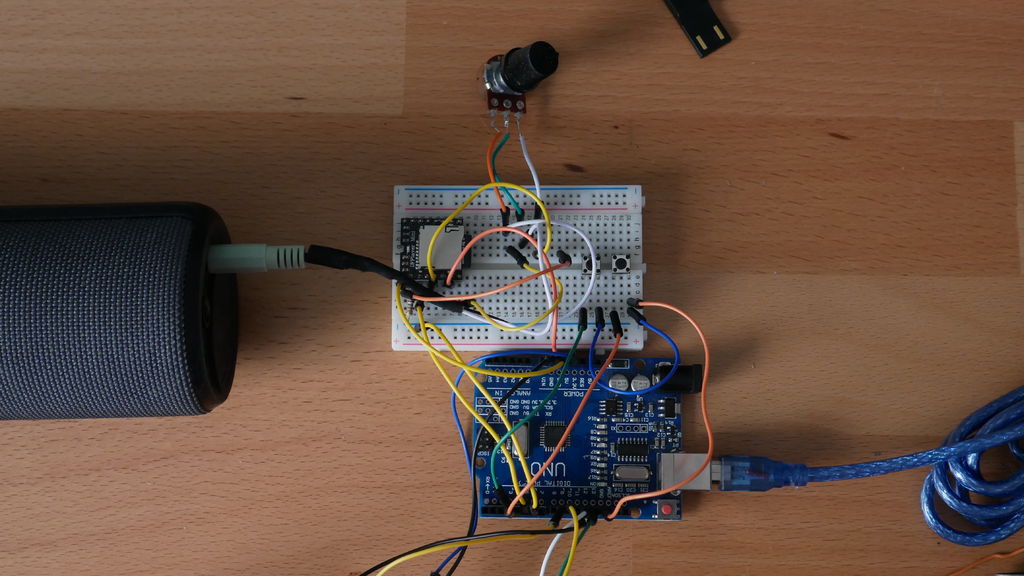
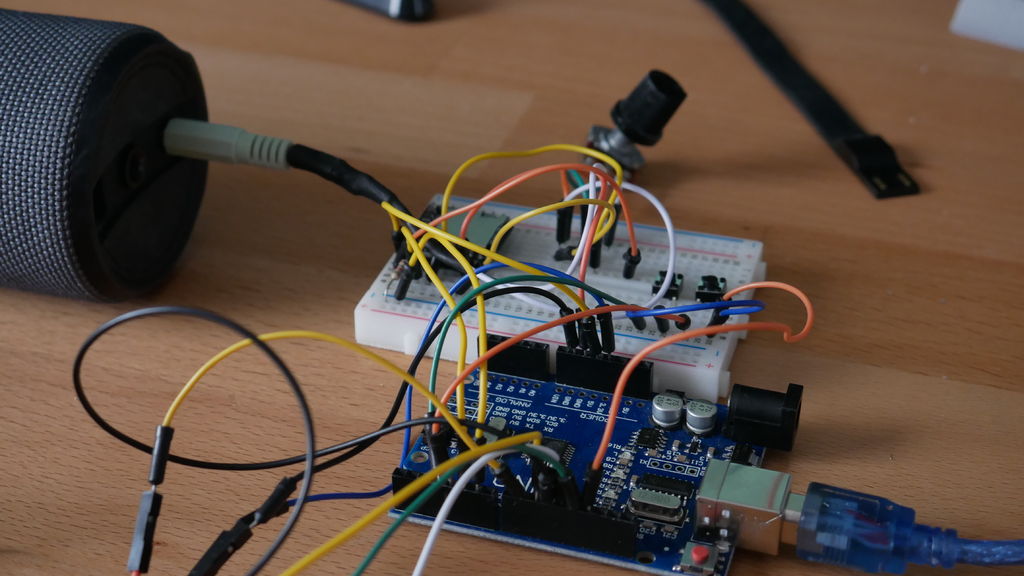
I recommend connecting everything up, and test if it all works before starting.
To do that, I used a breadboard and some jumper wires to quick and easy check that it all worked as intended. I had some problems with the first RC522 module I bought, it just didn’t work even though it came straight from the factory. So I had to get a new one… That’s why I recommend getting 2 of them, that way you are sure that if you break one of them, you have a spear.
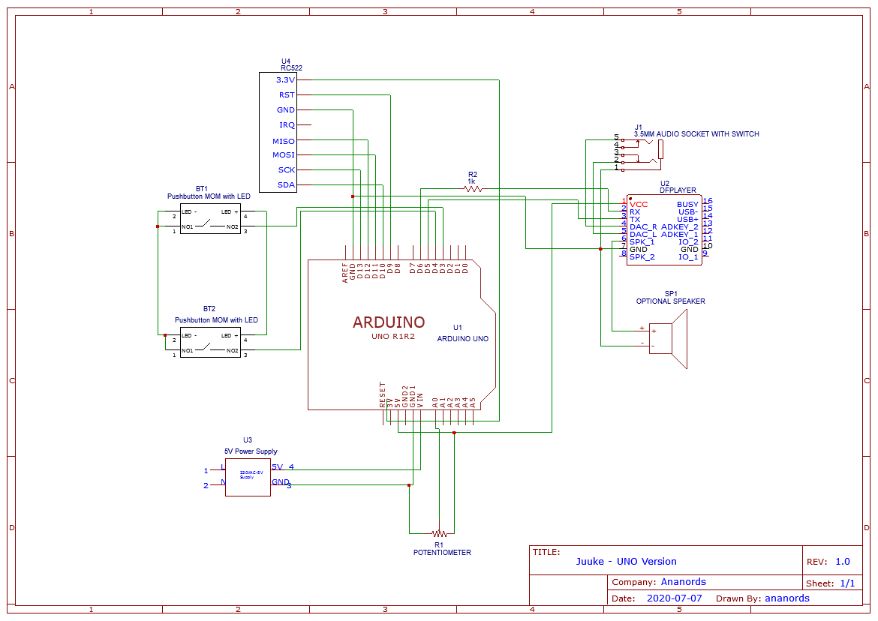
Connect everything according to the circuit diagram here (Link), or see the attached pictures.
Remember to use a 1K resistor between RX on the DFPlayer Mini and the Arduino.
To check if the card reader works, you can use the “Dump card” example sketch from the library. (See step 4)
Step 4: The Code – Programming the Cards
To get a better understanding
of how the code works with the DFPlayer mini, I will try to explain it
as easy as possible. The DFPlayer mini works by playing songs from a
micro SD card. To know which song to play, the songs has to be stored as
a number to the SD card. Song number 1 is stored as “0001 – SONG NAME”,
song number 2 is stored as “0002 – SONG NAME”, and so forth. We can
write a number to the RFID cards, so if we write the number 2 to one of
the cards and place it on the reader, the Arduino will read the number
and say to the DFPlayer mini, “play song number 2”.
The number we write to the card has to be the same number as the name of the song we store on the SD card.
If you would like to learn more about the DFPlayer mini, visit this page with lots of great information
You can now open Arduino and upload the code for the card programming. I have divided the code into two parts. One for programming the cards, and one for the actual player. In this step, we will start by programming the cards. The code is published to GitHub, and added below. You will also need to download the following libraries:
I have tried to explain the code with comments as much as possible, but if you have any questions, don’t be afraid to ask them in the comment section!
Also, I am not a great programmer but I would like to become one, so if you see any mistakes in the code a comment would be great!
To upload the code to the Arduino, see this article. To add libraries, see this article.
MODES:
The card programmer has two modes, automatic and manual.
Manual mode: Writes the number you want to write to the card. Type in a number, and it will store it.
Automatic mode: Starts at the number you specify in the code, and increases it by 1 every time you place a card on.
HOW TO USE THE CARD PROGRAMMER:
Connect the Arduino Open Serial monitor (top right corner) Write “manual” for manual mode and “auto” for automatic mode. (See above) Place a card on the reader, and make sure it says succeeded.
Attachments
Step 5: The Code: Player Mode
Once
you have programmed the cards, you can upload the music player code.
This is the code that reads the card and plays the associated song.
The process is exactly the same as for the card programmer code. Upload the sketch, and start using it!
PS: IMPORTANT! To disable the serial communication where you can see what the program is doing in the serial monitor, you have to comment out “Serial.begin(115200); “. Just add“//” in front of the line. I had some problems where the program would not run if it was enabled. (It was waiting for a serial connection before it would start)
Step 6: Download Songs to the SD Card
As said previously, you have to
give the music files on your SD card a specific name for it to work.
Every song has to start with a number. The number also has to be 4
digits (1 is 0001 for example).
After these digits, you are free to add the name of the song. For example: “0035 – Frank Sinatra – Fly me to the moon”
It uses standard MP3 files, so it’s simple to copy them over to SD card and rename them.
Step 7: Test, Then Solder
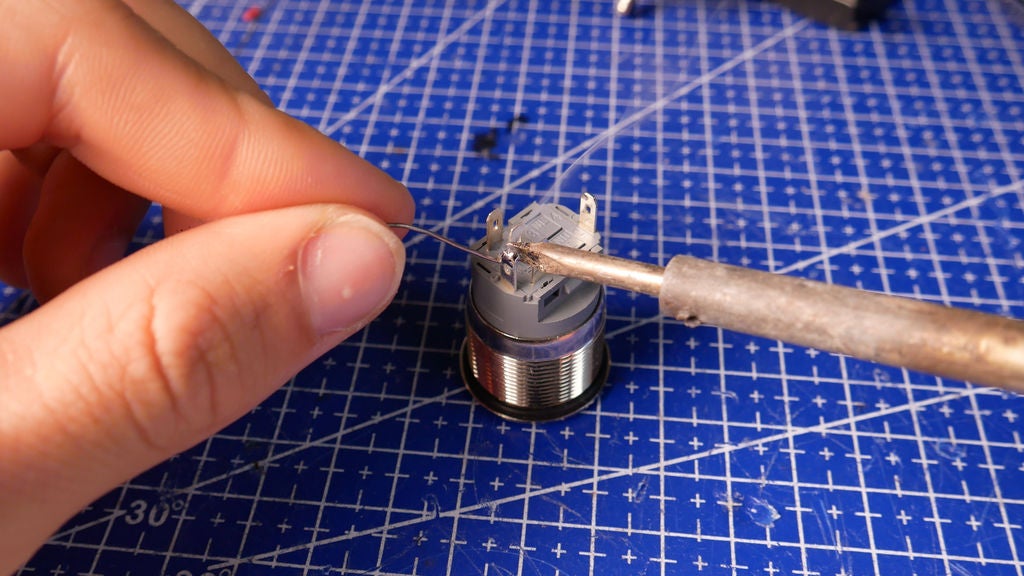
When you have tested that everything is working as intended, you can start soldering the parts to the Arduino UNO shield.
Just follow the circuit diagram wire for wire. It is smart to print it
out, and use a colored marker to mark which wires you have soldered on. I
also recommend to use pin headers for the DFPlayer Mini so you don’t damage it under soldering.
I also desoldered the RC-522 Led, because it was showing through the print.
Step 8: Make the Enclosure
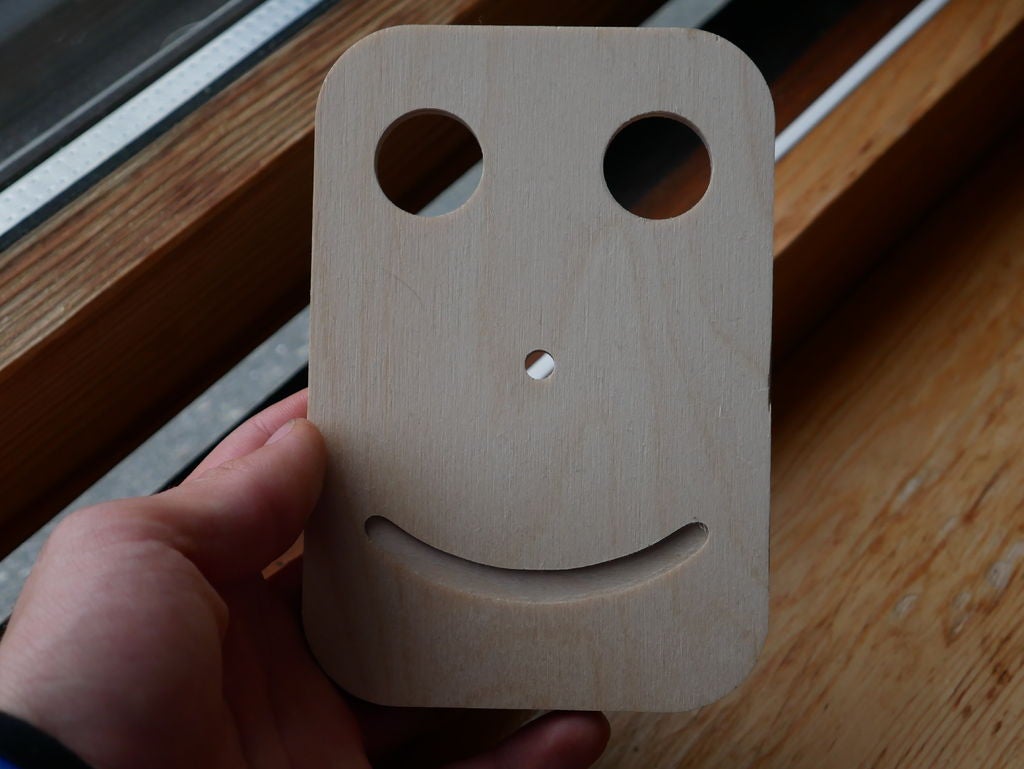
In this step I am going to show you how I made the enclosure.
I designed it using Fusion 360, and 3D printed it. I also made one using a CNC machine, and some plywood.
If you don’t have a 3d printer or a CNC machine, don’t worry! It’s also possible to make an enclosure out of cardboard or using a project box
You can find all the files here:
3D printed:
STL: CULTS 3D | Thingiverse
FUSION 360: Ananords.com
The settings I used to 3D print it is:
Infill: 15%
Layer height: 0.2mm
Supports: YES
Just insert the UNO and the RC522 into the pins on the 3D print. They should fit snugly. I recommend using a drop of glue to secure them in place. Do the same with the audio jack. For the buttons, potentiometer and power socket, use the included hex nuts.
When you are done, just snap the bottom plate and the “face” together.
Step 9: Make the Cards
Start with the design.
I made the designs in Adobe Spark, where I used the card dimensions (85 mm x 54 mm) as the custom size
I found the pictures on google and imported them into Adobe Spark, set the song title and artist, and done!
Since I don’t have an id card printer, I had to find another way to make the print on the cards. I went the simple route, and just printed it on paper then glued it to the cards.
You can also just use a pen and write directly on the cards.
Step 10: Done!
You are now done!
If you make this project, please post a make:)
Any questions? Just ask, and I will try to answer them.
Follow me on Instagram for updates on upcoming projects!
Instagram: https://www.instagram.com/ananordss/
••• Support me •••
Patreon: https://www.patreon.com/ananords
Donations: https://ananords.com/products/donation/
Buy me a coffee: https://www.buymeacoffee.com/Ananords/
Hi There
I love the idea of this project as Im making one for my father in law with Altheimers. I have it breadboarded and the player works fine playing 1 ofthe five mp3 files on the card. However try as I might I cant get the programmer to work? I keep getting this message Write manual for Manual mode or auto for Automatic mode
Device is now in manual
mode
Place the card on the reader and hold it there to write song number data to the card
Wrong value, write auto or manual
which seems to skip over whetehr or not I add a card to the reader. The reader works fine and I have a separate 13.56 Type A MIFAIR reader/writer but im not sure if simply adding the ID as 00000001 etc would work? It does not appear to. Is there a way I could read the card info and spoof a look up table to equate the card ID to track number etc? I assume thats what the programmer does but I can seem to get it to do anything beyond the error above? If you can help I’d be grateful as the project is really nice and I would love to get it working with the cards some how. Thanks Nick
additional info…when i run the player and add a card i get this…so I guess the “number” is not being written for some reason?
Initializing DFPlayer … (May take 3~5 seconds)
DFPlayer Mini online. Place card on reader to play a spesific song
Shuffle Play
**Card Detected:**
Card UID: 01 00 00 00
Card SAK: 08
PICC type: MIFARE 1KB
Number:
Any ideas? perhaps I can somehow write number to a specific address in the card but not sure how to be honest or even where it should go etc?
Hi!
I need some more info first…
Which card reader are you using?
Have you tried the example sketches included in the RC522 reader?
Will try to answer your other questions as soon as possible!
Hi there thanks for getting back to me if it’s easier you’re welcome to email me direct on nick@bring2mind.co.uk
Yes it’s the same card reader as you are using and the card reader reads cards fine as it dump some the contents when using the dump ino. I’m having some issues with finding read and write cards of the correct type but have been testing with RFID fobs A type that read and write fine on my stand alone RFID card reader /writer etc. I’m wondering if I need to update my IDE as I’ve had other issues before whe the code does appear to compile ok but some libraries don’t always work as expected. I wonder what IDE version you are using? I really like the idea behind this and I’m hoping that with your help I may get it working. I’m 3D printing the case tomorrow and I’ll post something pics to Instructables when completed etc,. Thanks for helping if you can. Best regards Nick
Hi there’ some success today I patched over the code to select auto or manual and programmed 1-15 cards ok. Rather oddly I have 5 test tracks on the SD card and they only play with cards 2 , 3, 6, 9, 10 or something like that. They are repeatable and trigger the player every time but card two plays track 0001 etc…all odd but hopefully I’ll get to the bottom of it tomorrow!
Hi there!
Fantastic little project. I managed to put it all together and get it working but I’m having some problems with the sound quality. There’s a quite noticeable humming when a song is playing. I tried connecting the dfplayer to a separate power supply but no luck. I was wondering if you had the same problem at all and if so any luck fixing it?
Thanks!
Hi Ananords,
Amazing project! I will try to build it,thanks!.
Does it has a good-normal quality sound?
Hi!
Yes, the sound quality is decent. Not audiophile good, but pretty great.
Hello,
Is it possible to play a map with 10 mp3 files in it? Is there a way to add this to the sketch in an easy way?